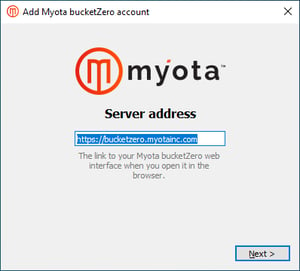
After client installation you will next be prompted to “Add Myota bucketZero account”, delete the web server address and replace with your bucketZero instance. The URL is the same URL that you type into your browser when you try to access your bucketZero instance, this is the website we address. For example, https://company.bucketzero.cloud. Click Next.
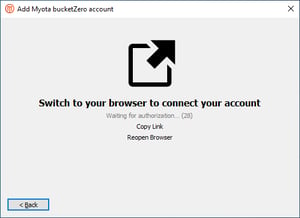
Your client will now prompt you to “Switch to your browser to connect your account”.
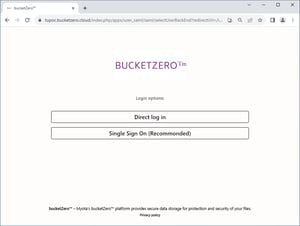
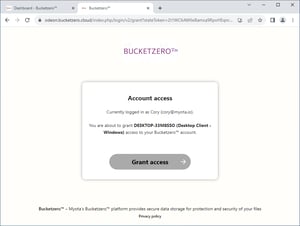
Your web browser should open and prompt you to login into your bucketZero instance. Enter your username and password in your web browser and grant access. Note* If you are already logged into Workspace in your browser you may not need to enter your username and password.
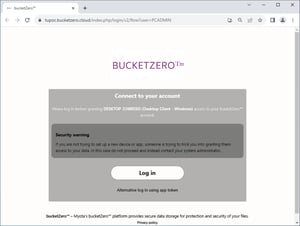
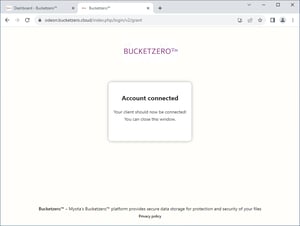
Click the Grant Access which will connect your client.
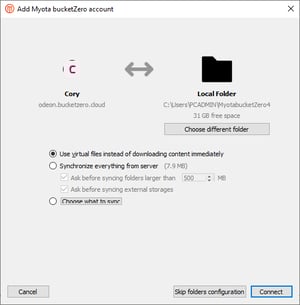
Your client will open with options to synchronize files and folders. On the local folder options screen, you may sync all of your files on the bucketZero server, or select individual folders. The default local sync folder is bucketZero, in your home directory.
When you have completed selecting your sync folders, click the Connect button at the bottom right. The client will attempt to connect to your bucketZero server, and when it is successful, the wizard closes itself. You can now observe the sync activity if you open the main dialogue by clicking on the tray icon. The initial sync could take several minutes if there are large numbers of files to synchronize.