Welcome to Myota—the world’s first cyber storage software platform with built-in quantum-resilient encryption, ransomware protection, and always-on immutable backups. This guide walks you through the essential steps for onboarding, using, and managing your Myota bucketZero Workspace (bZw).
1. Myota Onboarding Process
1.1 Core Setup
-
Enable SSO Integration
Set up Single Sign-On (SSO) to simplify and secure user authentication. -
Import Security Groups
Sync your organization’s security groups from your identity provider for seamless permission management. -
Design Folder Structure
Build an organized and intuitive folder hierarchy aligned with your team's workflows. -
Deploy Intune MDM Package
Use Microsoft Intune to distribute the Myota application for Mobile Device Management (MDM) compliance.
1.2 Additional Onboarding Tasks
-
Configure data retention policies
-
Set granular user permissions
-
Provide user training on Myota features
-
Set up monitoring and alert systems
2. Understanding bucketZero: Myota’s Cyber Storage Platform
Myota's "Shred and Spread" file encryption technique ensures confidentiality and resilience by:
-
Splitting files into multiple encrypted "chunks"
-
Encoding each chunk into "shards" with metadata and one-time keys
-
Distributing shards across multiple secure storage locations
This architecture protects against ransomware, data loss, and unauthorized access.
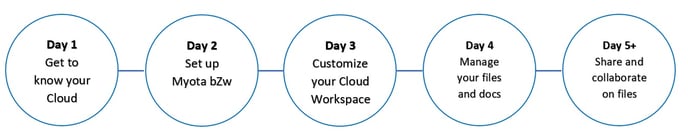
3. Getting Started with bucketZero Workspace
3.1 Prepare Your Workspace
-
☐ Explore the Myota bZw platform
-
☐ Schedule and conduct user training
3.2 Set Up Your Account
-
☐ Sign in at:
https://company.bucketZero.cloud -
☐ Add users (Admin only)
-
☐ Install and configure the bZw Client
3.3 Customize Your Environment
-
☐ Set up user profile and preferences
-
☐ Configure password and security settings
-
☐ Manage dashboard widgets and notifications
4. File Management and Collaboration
4.1 Upload & Manage Files
-
Upload files/folders
-
Add favorites
-
Manage versions
-
Use search to locate content
4.2 Share & Collaborate
-
Share files and folders with customizable permissions
-
Add comments, tags, and monitor changes
-
View “Others with Access” to track shared visibility
-
Collaborate via internal and public links with advanced options like:
-
Expiration dates
-
Upload-only (File Drop)
-
Password protection
-
Editable links
-
4.3 File Tracking & Retention
-
Use Activity logs to monitor changes
-
Use tags for retention policy enforcement
-
Recover deleted files within 30 days
-
Understand sync status icons:
-
🟦 Online-only
-
✅ Locally available
-
🟢 Always available
-
🔴 Sync error
-
5. Client Installation and Configuration
6. Administration of bucketZero Workspace
6.1 User Management
-
Add, view, and manage users and groups
-
Set default quotas and manage storage locations
-
Enable, disable, or delete accounts
-
Send automated setup emails
User attributes include:
-
Login Name: Unique and unchangeable
-
Full Name: Editable display name
-
Password: Admin- or user-set
-
Groups: Assign users to teams
-
Quota: Set storage limits
-
Manager: Assign for organizational charts
6.2 Managing Permissions
-
Group Admins: Manage users within assigned groups
-
Super Admins: Full access to all settings and user accounts
6.3 Storage Quotas
-
Set organization-wide defaults
-
Customize per user (e.g., 500 MB, 5 GB, etc.)
7. Support & Resources
-
Visit the Myota Knowledge Base
-
Schedule white-glove support: Request Support
-
Review FAQs, installation guides, and troubleshooting tips